 M³ Solution
Special measurement technology - Automation - Loading systems
 Quality Data Systems
QDS Hardware and Software
 Styli
Styli
Probes from KOMEG - Perfection for your Quality Assurance
 Fixture Systems
Standard fixture systems - for measurably better results
 Special Solutions
To get an overview of KOMEG's capabilities, our collection of individual special solutions is particularly useful.
 Career
Learn more about KOMEG as an employer and how you can start your career with us!
 Contact persons
You have questions or need more information? We are happy to help you!
 Discover Mitutoyo
The world's biggest metrology company
 Aerospace
Complex aerospace applications need fast, extremely precise quality control to ensure accurate assemblies. See how Mitutoyo makes it happen
 Automotive
The automotive industry continues to innovate, and Mitutoyo delivers the advanced inspection and scanning capabilities to help manufacturers achieve ongoing production
 Energy
Our measurement and analysis solutions are designed to help energy providers improve reliability and increase equipment uptime.
 Medical
To protect patient well-being, medical applications require exceptional accuracy. Learn how extensively tested solutions from us can help you do just that.
 General Manufacturing
Ensure high repeatability and strict quality control with form measuring solutions, coordinate measuring machines and precision measuring machines from us.
 Electro
Our non-contact and optical measurement solutions bring microscopic accuracy to smaller and denser electronic components.
 Special Solutions
To get an overview of KOMEG's capabilities, our collection of individual special solutions is particularly useful.
 Product Literature
Sehen Sie sich unseren Katalog, unsere Produktbroschüren und mehr an und laden Sie sie herunter.
 Mitutoyo Online Katalog
Sehen Sie sichdas umfangreiche Sortiment von Mitutoyo im Online-Katalog an!
-
Products
- Back Products
- Products
-
M³ Solution
- Back M³ Solution
- M³ Solution
-
Quality Data Systems
- Back Quality Data Systems
- Quality Data Systems
- Styli
-
Fixture Systems
- Back Fixture Systems
- Fixture Systems
-
Special Solutions
- Back Special Solutions
- Special Solutions
-
About us
- Back About us
- About us
-
KOMEG
- Back KOMEG
- KOMEG
-
Learn more about KOMEG
- Back Learn more about KOMEG
- Learn more about KOMEG
-
Certifications and accreditations
- Back Certifications and accreditations
- Certifications and accreditations
- Career
-
Contact persons
- Back Contact persons
- Contact persons
-
Discover Mitutoyo
- Back Discover Mitutoyo
- Discover Mitutoyo
-
Name & Philosophy
- Back Name & Philosophy
- Name & Philosophy
-
Mitutoyo Corporation
- Back Mitutoyo Corporation
- Mitutoyo Corporation
-
Mitutoyo in Europe
- Back Mitutoyo in Europe
- Mitutoyo in Europe
-
Products Legitimacy (FAKE)
- Back Products Legitimacy (FAKE)
- Products Legitimacy (FAKE)
-
Industries
- Back Industries
- Industries
- Aerospace
-
Automotive
- Back Automotive
- Automotive
- Energy
- Medical
-
General Manufacturing
- Back General Manufacturing
- General Manufacturing
- Electro
-
Special Solutions
- Back Special Solutions
- Special Solutions
-
Modification Micrometer 422-230-30
- Back Modification Micrometer 422-230-30
- Modification Micrometer 422-230-30
-
Downloads
- Back Downloads
- Downloads
-
Product Literature
- Back Product Literature
- Product Literature
-
Mitutoyo Online Katalog
- Back Mitutoyo Online Katalog
- Mitutoyo Online Katalog

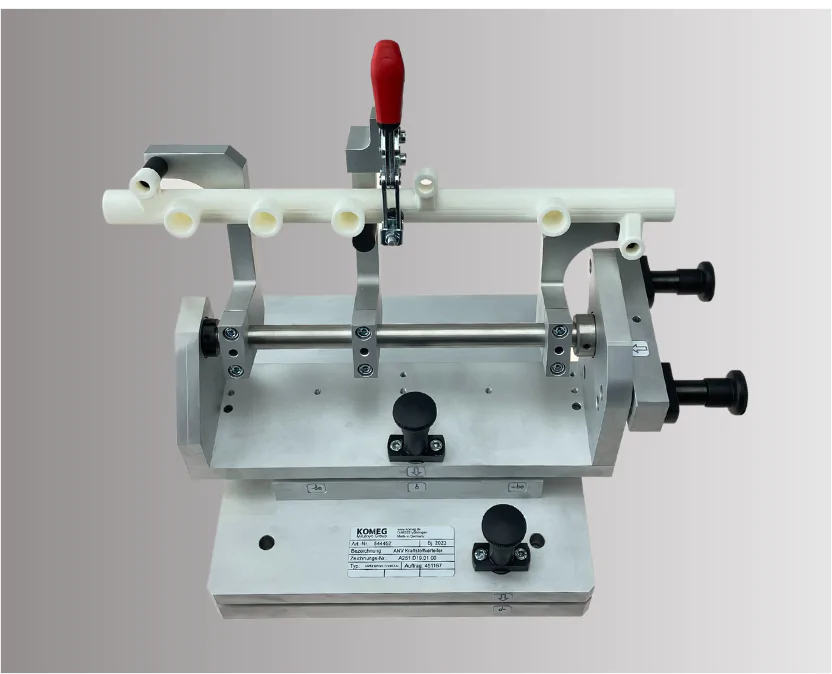
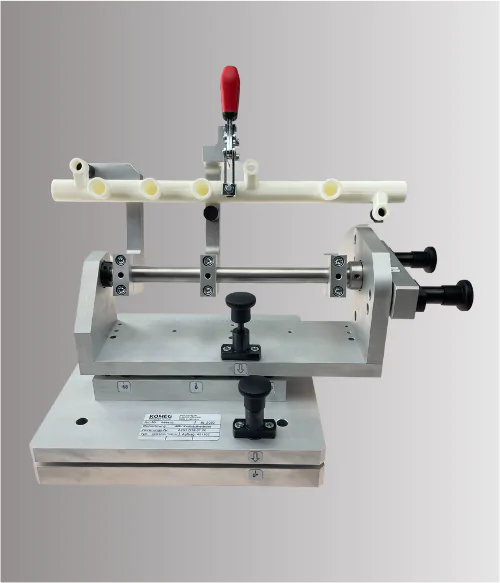
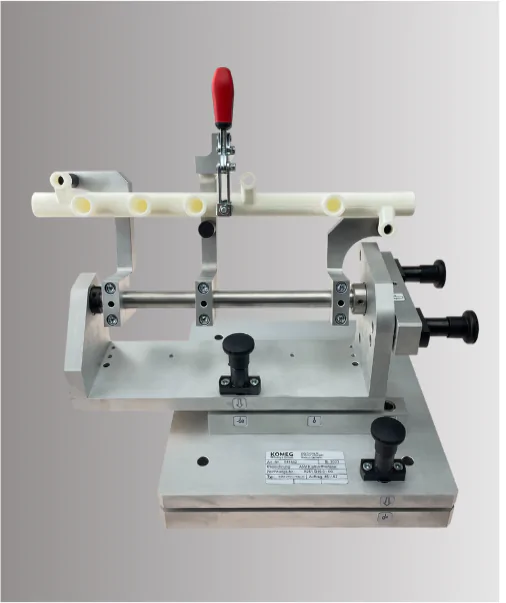
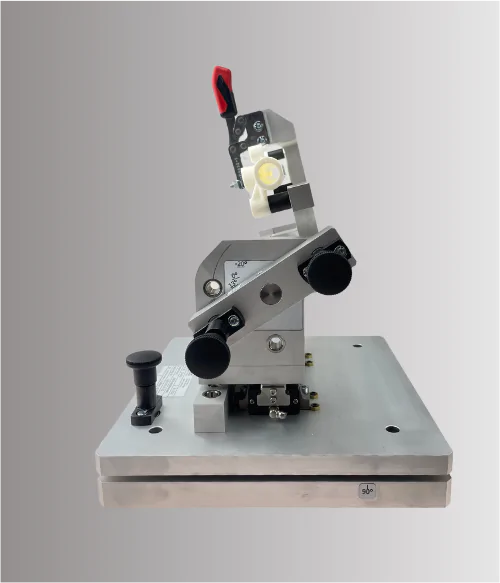
Combination fixture
A combination holding fixture was built for the defined holding of customised components for measurement with the Mitutoyo CS3200 measuring device.
The fixture is based on a base plate for mounting on the Mitutoyo Y-table 178-097.
A rotating fixture plate is positioned on this base plate, which is provided with setting-out positions. This enables reproducible positioning of the components for measurement.
Furthermore, the fixture has a swivelling axis with lockable swivel positions to enable the measurement of subsidence.
The additional adjustment axis / adjustment plane in the axial direction of the component enables the probe to be immersed in the channel bores of the components. The displacement positions can be indexed.
Rotation and swivelling in the fixture, as well as clamping of the components using clamping elements, is performed manually.
Advantage: All measuring positions and angular positions for measuring the roughness and shape of the workpiece can be achieved with just one clamping device.


Do you have any questions about the product or would you like to find out more about our customised solutions?
Contact us and we will be happy to help you!


